To master podcast audio, take the finished, edited episode and run it through four steps in this order: a gentle EQ that cuts low rumble, light compression to even out the voices, loudness normalization to about -16 LUFS, and a limiter that keeps true peaks at or below -1 dBFS. Those two numbers are Apple Podcasts' published targets, and free software such as Audacity can do every step. Then listen on headphones and a phone speaker before you export.
Mastering is the last pass, not a repair step. Noise, echo and bad cuts belong in the edit; mastering only makes a clean episode sound consistent and sit at the right volume next to other shows.
What mastering means for a podcast
In music, mastering is a separate craft. For a spoken-word podcast it is simpler: you want every episode to sound the same, at a loudness listeners don't have to adjust, without peaks that distort after the file is encoded to MP3 or AAC.
Apple's audio requirements for Apple Podcasts ask for:
Target
Value
Loudness
About -16 LKFS (the same scale as LUFS), with a tolerance of 1 dB
True peak
No higher than -1 dBFS
When
Before encoding, because encoding can clip the signal
Other platforms and hosts publish their own guidance, but -16 LUFS is a common podcast target and a safe default.
Before you start
Finish the edit first. Cuts, music and level balance between the speakers should be done. If you haven't edited yet, do that first.
Fix noise before mastering. Compression and loudness make quiet background noise louder. If the voices sit in hiss or room noise, clean that first; five ways to clean up audio without recording again covers the options.
Work on a copy. Export a full-quality WAV of the edited episode and master that, so you can start over.
Mix down to one file. Mastering works on the whole episode. In Audacity, select all tracks and use Tracks → Mix → Mix and Render, or export the mix and import it into a new project.
Step 1: EQ (clean up the low end)
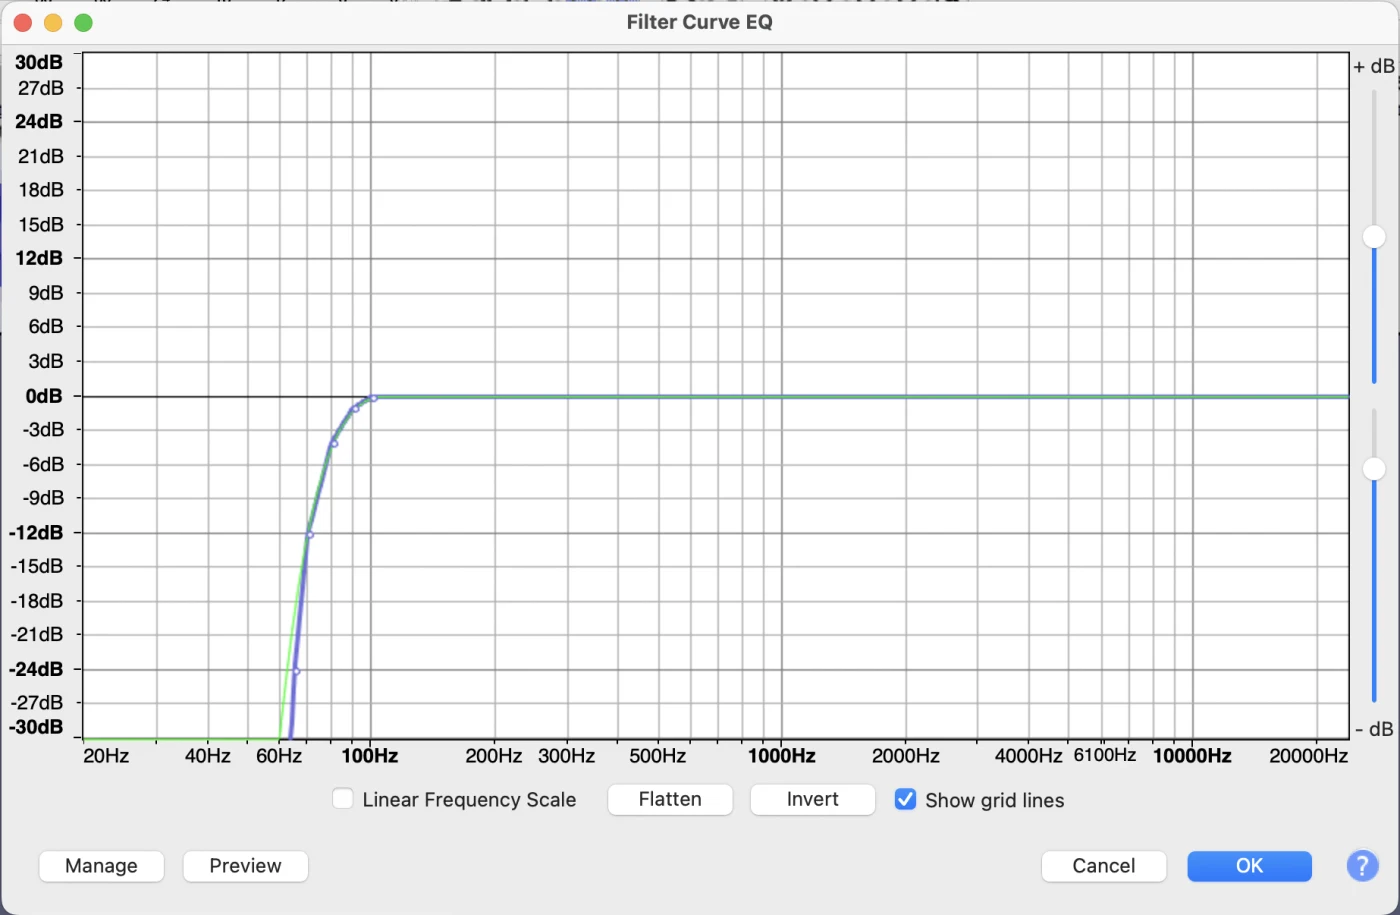
Most voice recordings carry rumble below the voice: traffic, air conditioning, desk bumps. Cutting it gives the compressor and limiter less useless energy to react to.
In Audacity:
Select the whole episode (Ctrl+A on Windows, Cmd+A on Mac).
Open Effect → EQ and Filters → Filter Curve EQ (in older versions simply Effect → Filter Curve EQ).
Click Presets & settings → Factory Presets → Low roll-off for speech. Audacity's own audiobook mastering guide starts with this preset. In older versions it is under Manage → Factory Presets.
Preview and click Apply.
Keep EQ gentle at this stage. If a voice sounds muddy or harsh, that is better fixed on that speaker's track during the edit than on the whole episode.
Step 2: Compression (even out the voices)
A compressor turns down the loudest moments so the quiet ones can come up. For speech, light compression makes a laugh and a quiet aside sit closer together, so listeners in a car or on a train don't keep reaching for the volume.
In Audacity:
Open Effect → Volume and Compression → Compressor (older versions: Effect → Compressor).
Under Presets & settings, newer versions let you try one of the factory presets that Audacity groups as presets for working with voice (Fat, Power, Make it Right). For recordings from the iPhone Voice Memos app, Audacity has a Voice Memos Balance preset that slightly raises quiet sounds.
Preview a loud passage and a quiet one, then apply.
If you set it by hand, a gentle starting point for a two-person conversation is a Threshold around -20 dB, a Ratio around 3:1, an Attack of about 10 ms and a Release of about 150 ms. Older versions label these a little differently. Aim for the loudest moments coming down by a few dB, not for a flat line.
Audacity's manual warns that compressing the louder parts can make breaths and close-up sounds more audible. If breaths jump out after compression, use a lighter preset or less make-up gain. Heavier is not better: an over-compressed voice sounds flat and tiring.
Step 3: Loudness normalization (hit -16 LUFS)
Normalization by peak (Normalize) only sets the loudest sample. Loudness Normalization measures how loud the episode sounds as a whole, which is what platforms measure too.
In Audacity:
Select the whole episode.
Open Effect → Volume and Compression → Loudness Normalization (older versions: Effect → Loudness Normalization).
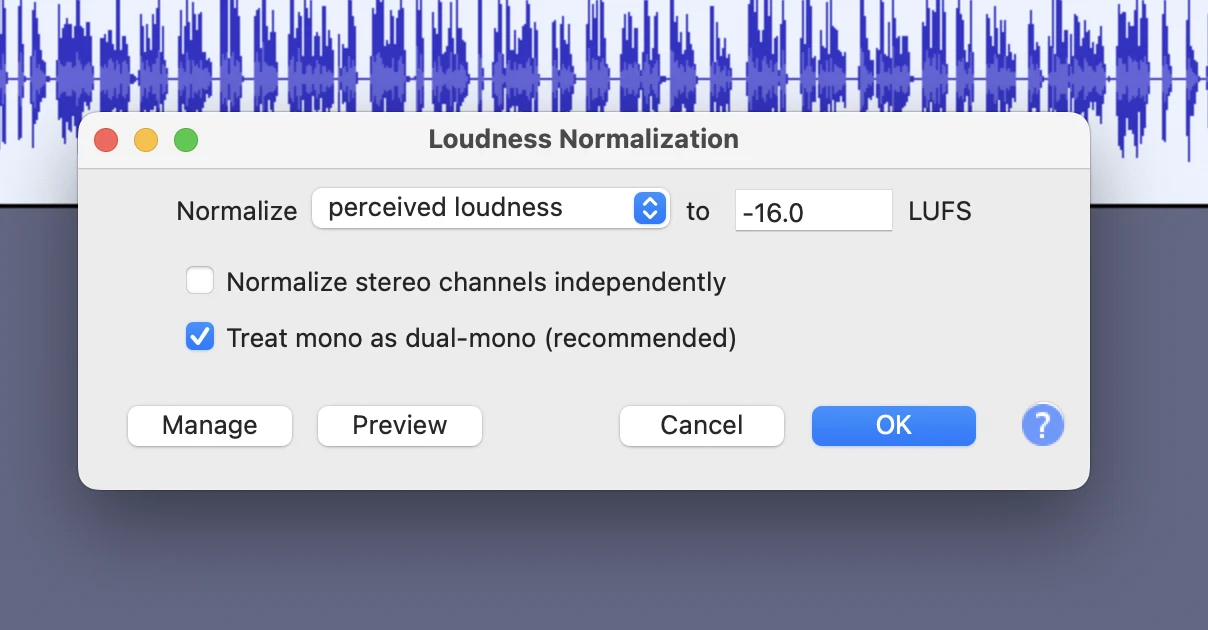
Set Normalize perceived loudness to-16 LUFS.
Leave Normalize stereo channels independently off for a balanced stereo mix.
Apply.
Audacity's documentation recommends loudness normalization as a final step before export, which is why it comes after EQ and compression. For a mono episode, leave Treat mono as dual-mono on. Audacity labels it as recommended, and it measures a mono voice the way it will sound when played through both earbuds.
Step 4: Limiter (protect the peaks)
Raising the loudness to -16 LUFS can push short peaks, like a laugh or a hard consonant, close to full scale. A limiter catches them so they stay below the ceiling. Audacity's manual describes limiting as usually the last stage of mastering.
In Audacity:
Open Effect → Volume and Compression → Limiter (older versions: Effect → Limiter).
In newer versions, load the VO Limiter factory preset under Presets & settings. Audacity's manual describes it as meant for dialogue, podcasts and other voice work.
Set Make-up target (the maximum output level) to -1 dB or a little lower.
Apply.
Audacity's limiter sets a sample-peak ceiling. True peak, which Apple specifies, can sit slightly above the sample peak after encoding, so a ceiling a little below -1 dB leaves room. A ceiling of -1.5 dB is a safe choice if you export to MP3.
Step 5: Check, then export
A meter does not hear everything. Before you upload:
Listen to the start, a loud moment and the end on headphones, then on a phone speaker. Phone speakers reveal boomy low end; headphones reveal clicks and breaths.
Check that every speaker sounds equally loud. If one guest is still quieter, go back to the edit and raise that track rather than compressing harder.
Re-measure if you changed anything, with a loudness meter that reports integrated LUFS. The free version of Youlean Loudness Meter (Mac and Windows) reads an exported file and shows its integrated loudness.
Export the mastered file. Apple's guidance for RSS feeds is MP3 or AAC (Apple recommends AAC in an MP4 container), at 64 to 128 kbps for mono or 128 to 256 kbps for stereo at 44.1 or 48 kHz. Your podcast host may ask for something specific; follow it.
Clean the recordings before mastering: clir Voice
Mastering raises everything, including the noise under the voice. If your episode was recorded on an iPhone, or a guest sent a voice memo, one option is to clean those recordings on the phone before you edit and master.
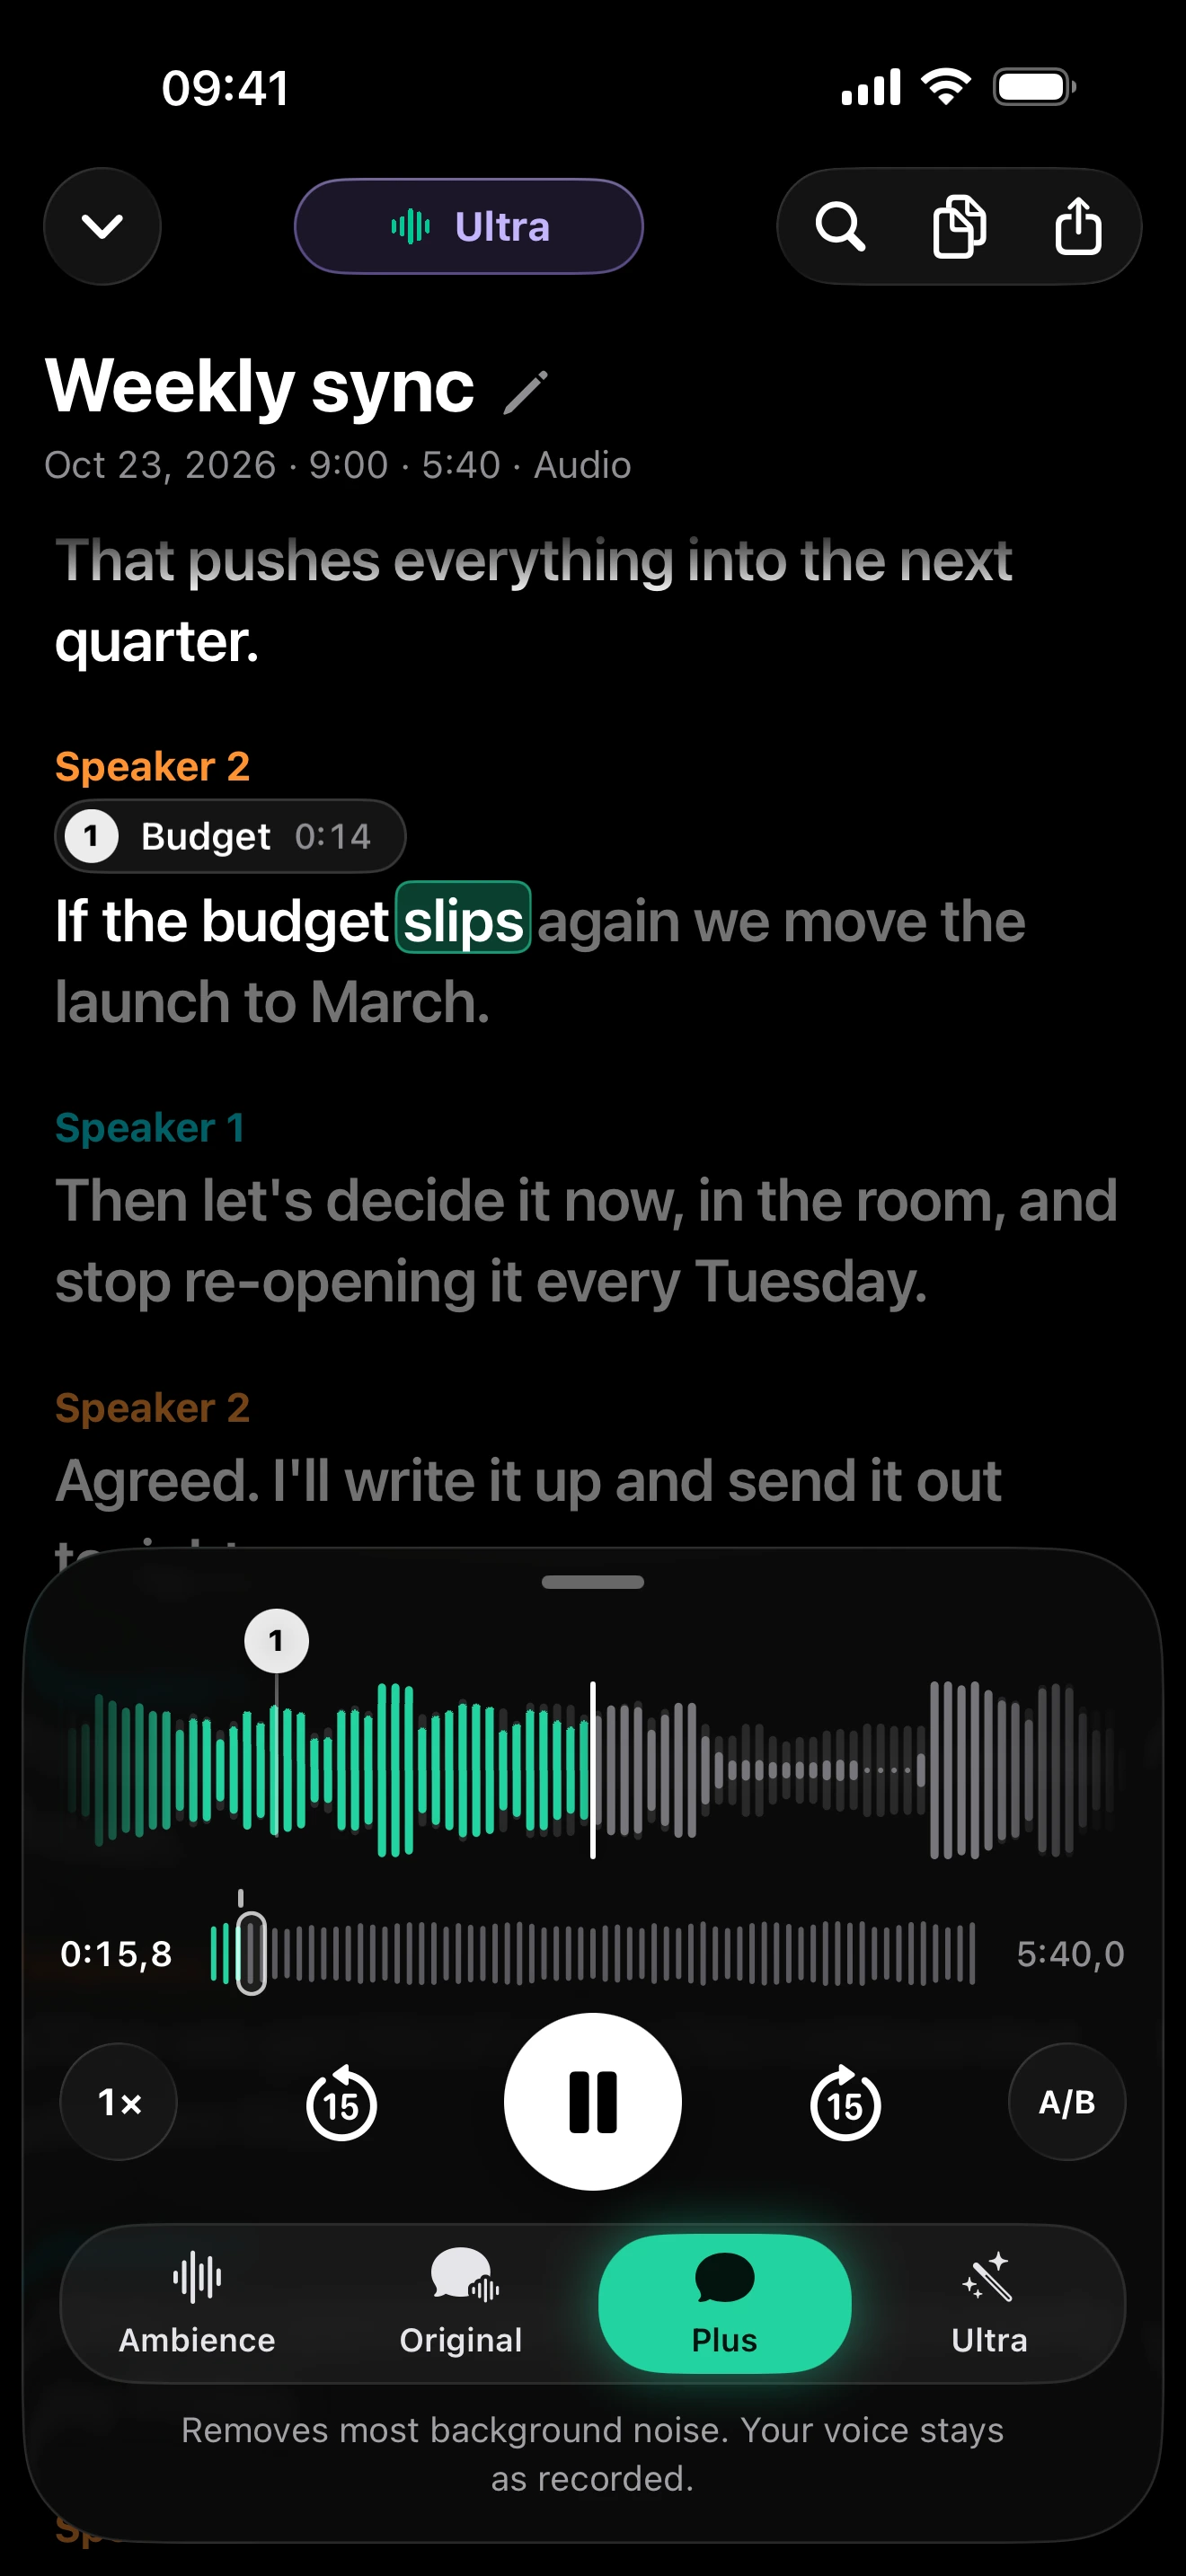
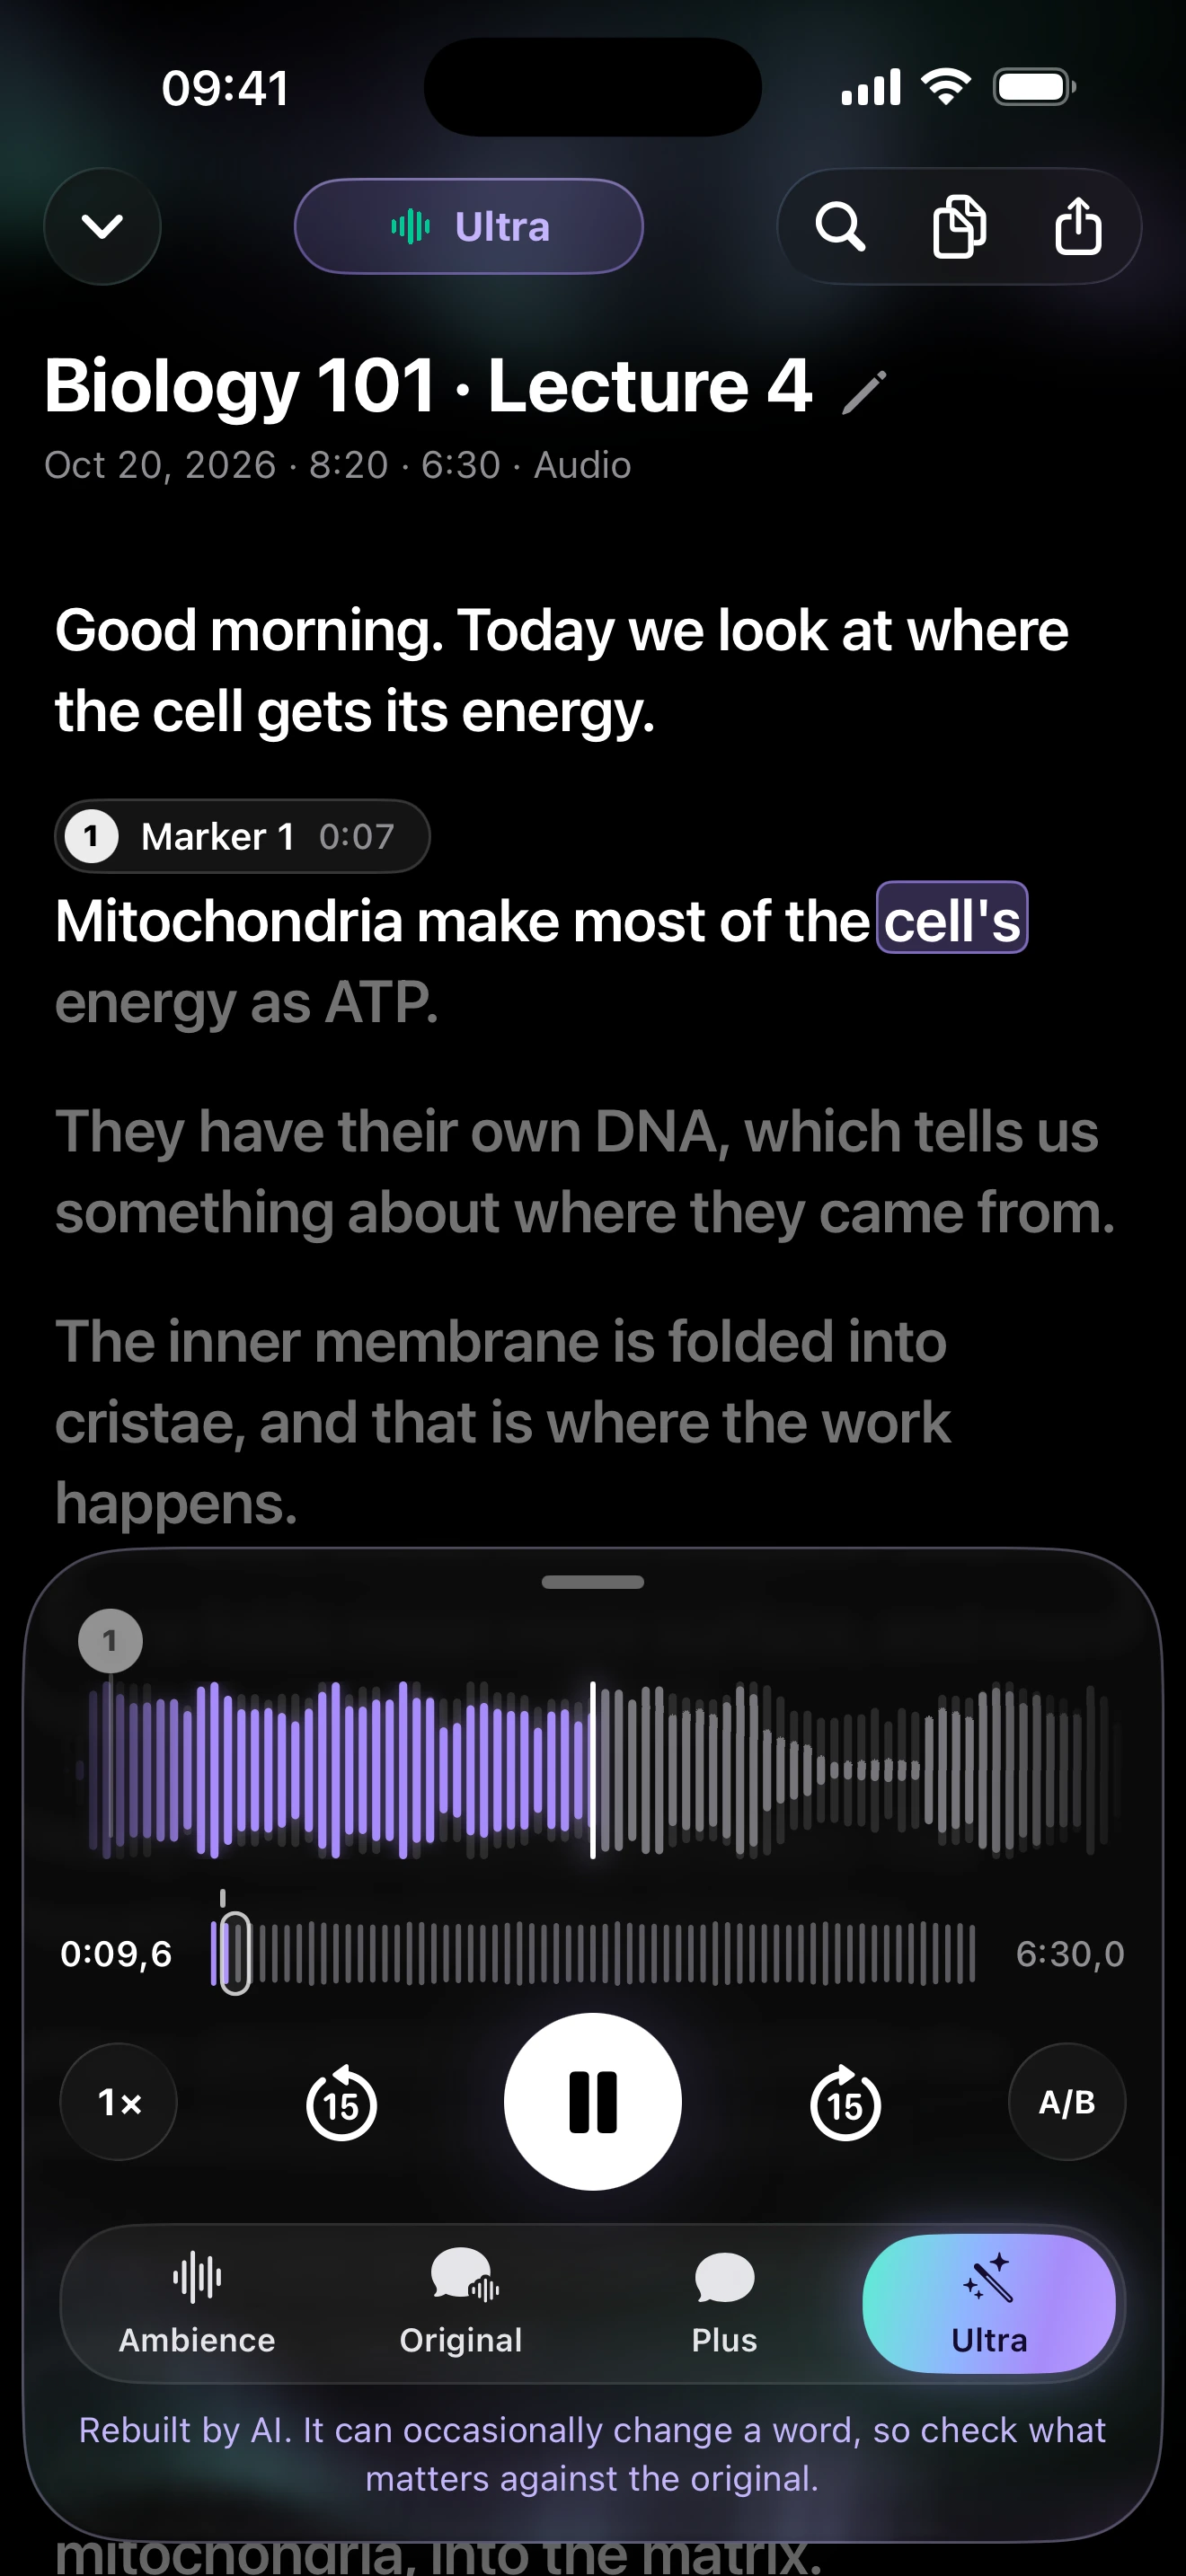
clir Voice imports recordings from Voice Memos, messaging apps, Files or the camera roll. Plus removes background noise such as cafés, traffic, wind and room noise and keeps the voice as recorded. Ultra also removes reverb and echo and rebuilds the voice with AI for a studio-microphone sound. Because AI reconstruction can occasionally change a word, check names, numbers and quotes against the original, which always stays available. Ultra needs more working memory than Plus, so try the free preview on your device first.
Plus · noise removalUltra · studio sound
Here is the difference on a test clip with added background noise: the original, then Plus and Ultra.
Background noise
Original
Plus
Ultra
Reference words
COME COME SAID HOLMES KINDLY IT IS HUMAN TO ERR AND AT LEAST NO ONE CAN ACCUSE YOU OF BEING A CALLOUS CRIMINAL
I UNDERSTAND YOU TO SAY THAT THERE ARE THREE STUDENTS WHO USE THIS STAIR AND ARE IN THE HABIT OF PASSING YOUR DOOR YES THERE ARE
Sample details & credits
Read speech with added noise or room effects. Plus and Ultra processed in clir Voice 2.3 (5), iOS Simulator. Playback loudness adjusted.
LibriSpeech: Vassil Panayotov, Guoguo Chen, Daniel Povey and Sanjeev Khudanpur, from LibriVox audiobooks. CC BY 4.0.
Other tools, briefly
Adobe Audition (paid): mastering effects and a loudness meter for checking the level against a target.
Buzzsprout Magic Mastering: an automatic mastering option for shows hosted on Buzzsprout.
GarageBand (free, Mac and iPhone): good for editing; check the result with a loudness meter before upload.
Prevention for next time
Record each speaker on a separate track, so level problems can be fixed in the edit instead of the master.
Keep recording peaks well below 0 dB. Audacity's audiobook guide suggests occasional peaks around -6 dB.
Record in a quiet room with soft furnishings; mastering cannot remove echo.
Save your EQ, compressor and limiter settings as user presets, so every episode gets the same chain.
Apple Podcasts asks for about -16 LKFS (LUFS) with a tolerance of 1 dB and true peaks no higher than -1 dBFS. That is a common podcast target and a sensible default if your host does not publish its own.
Does a podcast need mastering?
Not in the music sense, but every episode should be loudness-normalized and peak-limited before upload. Without it, your show may sound much quieter or louder than the one before it, and peaks can distort after MP3 or AAC encoding.
What order should I master podcast audio in?
EQ first, then compression, then loudness normalization, then a limiter as the very last effect before export. Noise cleanup and edits come before all of these.
Can I master a podcast in Audacity for free?
Yes. Audacity has Filter Curve EQ, Compressor, Loudness Normalization and Limiter under the Effect menu, including voice presets for the compressor and limiter. Check the result by listening on headphones and a phone speaker.
What is the difference between mixing and mastering a podcast?
Mixing balances the separate tracks: each voice, music and sound effects. Mastering works on the finished mixdown and sets the overall tone, dynamics and loudness for publishing.